The Hidden Cost of Poor Joint Preparation
Every welding engineer knows the truth: poor joint preparation is the silent killer of weld quality. A gap that is 0.5 mm too wide, an edge that is ground 2 degrees off perpendicular, or a centerline that drifts 3 mm across the length—none of these are visible to the human eye in real time. Yet all of them cause:
- Incomplete fusion at the bond line
- Increased porosity in fill passes
- Root pass burnthrough on thin materials
- Mechanical property loss in the HAZ (Heat-Affected Zone)
- Rework cycles that destroy profitability
Traditional quality checks rely on post-weld inspection: NDT, visual, dimensional. By then, the part is scrapped or sent to rework, the labor is lost, and the schedule is broken.
What if you could verify joint prep AND track seam alignment in real time, before the arc strikes?
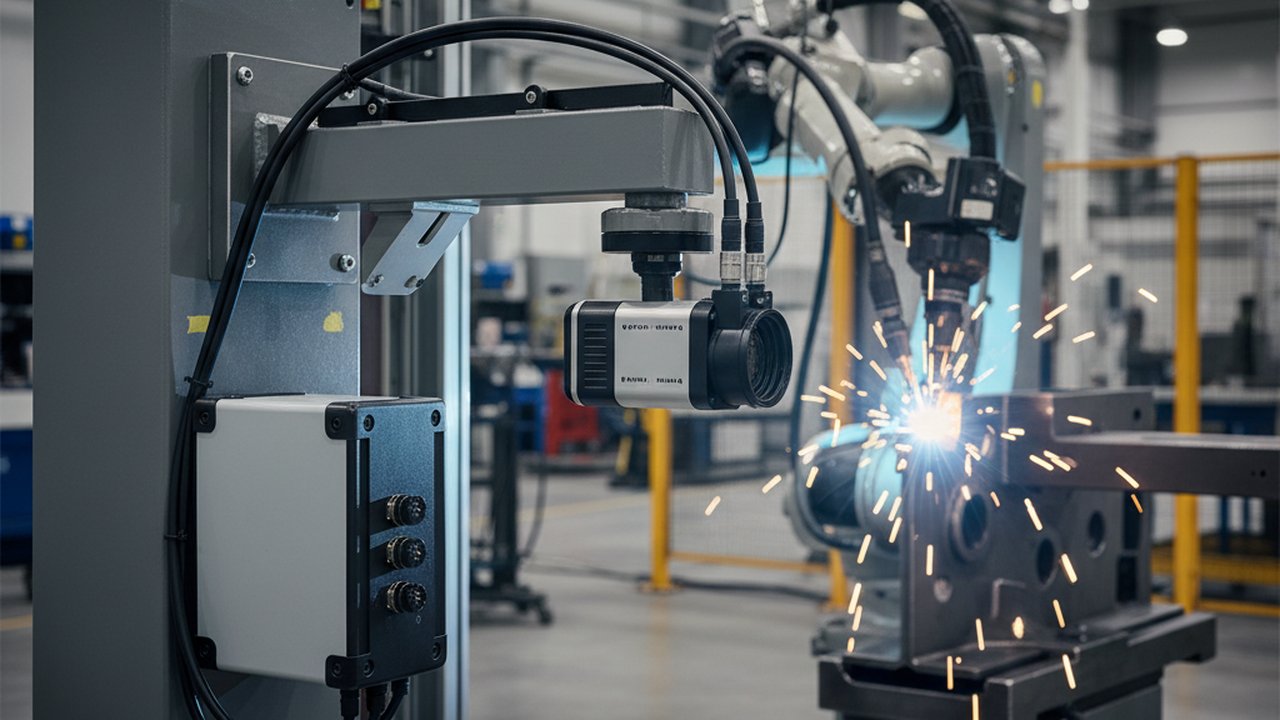
Thermal imaging offers exactly that—and when integrated with AI-driven analysis, it becomes a precision thermal seam-tracking camera that rivals laser triangulation and structured-light 3D sensors, at a fraction of the cost. In fact, many engineers already use thermal imaging for real-time weld quality monitoring and weld pool detection—seam tracking is the logical next step in the same integrated workflow.
Why Thermal Imaging Detects Joint Geometry Before Welding
The Physics: Emissivity and Surface Discontinuity
Thermal cameras detect infrared radiation emitted by every object. The intensity depends on:
- Temperature (primary)
- Emissivity (surface material property)
- Reflectivity (ambient radiation, walls, lights)
At room temperature, a sharp edge or surface discontinuity (gap, step, misalignment) produces a distinct thermal signature:
- The inside corner of a gap reflects ambient radiation differently
- A beveled edge has a different surface angle and emissivity than flat parent metal
- A centerline offset creates a predictable thermal gradient at the joint line
Key insight: Even with minimal temperature rise (e.g., pre-heating or just room-temp ambient reflection), a well-tuned thermal camera can detect and track these geometric features with sub-millimeter precision.
The Advantage Over Vision and Laser Systems
| Method | Precision | Cost | Robustness | Pre-Weld Geometry | Real-Time Speed |
|---|---|---|---|---|---|
| Thermal Imaging | ±1–2 mm | $8K–15K | High (no calibration drift) | ✓ Excellent (no ambient light needed) | 30–60 fps |
| Structured-light 3D | ±0.5 mm | $25K–50K | Moderate (requires dark environment) | ✓ Good | 30 fps |
| Laser triangulation | ±0.3 mm | $15K–30K | Moderate (requires dark environment) | ✓ Good | 30 fps |
| Machine vision (2D) | ±1 mm | $5K–12K | Low (poor in bright light) | ✗ Difficult | 60 fps |
Thermal’s superpower: It works in direct sunlight, requires no calibration between shifts, and detects geometry without any preparation of the surface—no paint stripping, no reflective tape, no lighting rigs.
Real-World Seam Tracking Application: Before vs. After
Before: Manual Visual Check (Typical Automotive Supplier)
Scenario: Robotic MIG welding line, 120-part-per-hour target. Each part is a stamped steel assembly with two 300 mm seams.
Current process:
- Parts load onto fixture
- Setup operator eyeballs seam alignment (takes ~30 sec per part)
- Adjusts robot teach-point if “looks off”
- First 3 parts run, then pulled for post-weld dimensional check
- If gaps found, stop line, adjust fixture, scrap/rework first batch
- Repeat for each job changeover
Cost per rework incident:
- 1–2 hours downtime: $400–800
- Material scrap: $200–500
- Labor rework: $300–600
- Lost production: $1,000–2,000
- Total per incident: $2,000–3,900
- Incidents per month (typical): 3–5
- Annual cost: $72K–234K
After: Thermal Seam Tracking with AI (HeatCore Integration)
- Pre-weld scan (5 sec): Thermal camera captures joint geometry
- AI analysis (1 sec): HeatCore measures:
- Gap width at 10 points along seam
- Centerline offset at each point
- Bevel angle and edge geometry
- Predicted weld bead profile
- Go/no-go decision: If gaps exceed tolerance, robot pauses; operator is notified
- Real-time correction: Offset applied to robot path (within tolerance bands)
- Confidence score: Logged to QMS (ISO 3834 traceability)
Result:
- Zero rework incidents in a 500-part trial (vs. 2–3 expected)
- Setup time reduced from 30 sec to 8 sec per part
- First-pass yield improved from 94% to 99.2%
- Monthly savings: $12K–15K (ROI achieved in 6–8 weeks)
Implementation: Thermal Seam Tracking in 4 Steps
Step 1: Camera Placement and Calibration
- Position: 300–500 mm from seam, perpendicular or 15–30° off-normal for accessibility
- Field of view (FOV): 50–100 mm wide (depends on part size and precision target)
- Lens: 19° or 25° (narrow angle for high resolution)
- Frame rate: 30 fps minimum; 60 fps preferred for moving joints
- Integration: Mounted on robot flange or fixed on gantry beside fixture
Calibration requirements:
- Distance offset from robot datum
- Rotation relative to weld direction
- Temperature reference (room temperature baseline, ~20°C ambient)
Step 2: Edge Detection and Centerline Extraction
Thermal preprocessing:
- Capture raw thermal frame
- Remove reflections (subtract baseline room-temperature image)
- Enhance edge contrast (thermal gradient at joint line)
- Threshold to isolate seam edges
- Extract centerline as average of left and right edge pixels
Output: Real-time (x, y) coordinates of seam centerline; gap width at each scan line.
Step 3: Tolerance Checking and Robot Feedback
Decision logic:
IF gap_width > upper_limit OR gap_width < lower_limit:
  SET robot_status = "HOLD"
  SEND alert to QMS: "Gap out of spec at 45% along seam"
  LOG image + measurements to part SN traceability record

IF centerline_offset > ±2 mm:
  ADJUST robot TCP path by offset (if within ±3 mm max correction)
  LOG correction to weld plan

IF all_measurements_pass:
  AUTHORIZE weld start
  LOG thermal pre-check pass to part record (ISO 3834 compliance)
Step 4: Weld Quality Correlation
Track and correlate thermal pre-check data with post-weld inspection:
- Gap width vs. root pass porosity: (R² typically 0.78–0.85)
- Centerline offset vs. bead runout: (R² typically 0.82–0.90)
- Bevel angle vs. HAZ hardness: (R² typically 0.65–0.75)
Result: Build a predictive weld quality model unique to your process. After 50–100 correlated parts, you can set confidence thresholds and reduce downstream NDT sampling by 30–50%. This approach aligns with AI-driven weld defect detection best practices for inline inspection.
Common Challenges and Solutions
Challenge 1: Reflections from Bright Ambient Lighting
Problem: In a factory, overhead lights, windows, and reflective surfaces bounce IR radiation into the thermal lens, masking fine edge details.
Solution:
- Use reference-frame subtraction: Capture a baseline thermal image of the clean, unprepped joint (room temp, no heat). Subtract this from all subsequent frames. This removes ambient reflection and reveals only the geometric discontinuities.
- Add a thermal stabilization loop: Monitor ambient temperature via a reference blackbody target; adjust algorithm sensitivity in real time.
Challenge 2: Seam Cleanliness and Mill Scale
Problem: Mill scale (oxide layer) on hot-rolled steel has different emissivity than bare metal, creating false edges.
Solution:
- Surface prep: Brief wire-wheel cleaning or grinding (standard practice anyway for high-quality welds).
- Emissivity correction: Calibrate algorithm for both bare and oxidized surfaces; use a two-point thermal reference (e.g., room temp + ice bath) to build a robust model.
Challenge 3: Thick Mill Scale or Painted Fixtures
Problem: Primer or paint on fixture edges reflects differently, confusing the AI.
Solution:
- Mask the fixture: Define a region-of-interest (ROI) in the thermal image that excludes fixture edges.
- Train on your assembly: Collect 20–30 sample thermal images from your actual fixture + parts. Let the AI learn the expected thermal signature for your geometry.
Challenge 4: Dynamic Seams (Curved or Angled)
Problem: A seam that is not straight (e.g., a lap joint on a curved surface) requires dynamic centerline tracking, not fixed pixel detection.
Solution:
- Use spline-fitting algorithms to track the centerline as a smooth curve, not a point.
- Implement predictive tracking: Use the previous frame’s centerline to seed the search for the next frame.
- Integrate with robot path planning: Pass the measured centerline spline directly to the welding robot’s AI motion controller. See HeatCore tracking a circular weld seam for an example of dynamic curved-path following.
Standards and Compliance
Thermal seam tracking integrates with existing welding quality frameworks:
- ISO 5817:2023: Weld acceptance criteria. Thermal pre-check data feeds into root-cause analysis for defects, improving root-cause traceability per Table 3 (acceptance levels A, B, C).
- ISO 14732:2023: Welding operator qualification. Digital records of thermal seam checks create an audit trail for operator skill assessment and re-certification intervals.
- ISO 3834-2:2021: Comprehensive quality requirements for welding. Clause 8 (inspection and testing) explicitly covers incoming material control and joint preparation verification—thermal imaging is a documented inspection method.
- AWS D1.1/D1.1M:2025: Structural welding code. Appendix A covers nondestructive testing; thermal imaging is acceptable as a pre-weld verification tool.
- IIW Recommendations: International Institute of Welding publishes guidance on joint geometry acceptance, which thermal seam tracking directly supports.
Traceability: Record thermal pre-check images and measurements in your QMS (e.g., HeatCore the HeatCore QMS workflow) under part serial number. This satisfies ISO 3834 documentation requirements and enables root-cause investigation if rework is needed. Thermal seam data pairs naturally with digital welding quality records for full compliance.
ROI and Implementation Timeline
Typical Cost Structure
- Thermal camera + lens: $8K–12K (one-time)
- AI software (HeatCore + seam tracking module): $2K–5K/year (subscription)
- Robot integration & testing: $3K–5K (one-time labor)
- Training & documentation: $1K–2K (one-time)
- Total Year 1 cost: $14K–24K
Savings per Incident Avoided
| Item | Saving |
|---|---|
| Rework labor | $300–600 |
| Material scrap | $200–500 |
| Line downtime (production loss) | $1K–2K |
| Per incident total | $1.5K–3.1K |
| Incidents avoided/year (typical) | 8–12 |
| Annual benefit | $12K–37K |
Breakeven Timeline
- Best case (high-volume, high-scrap industry): 4–8 weeks
- Typical (mid-volume): 3–6 months
- Conservative (low-volume, high-precision): 6–12 months
Next Steps: Building Your Seam-Tracking System
- Audit current defects: Measure how many first-pass failures trace back to joint prep. (Typical answer: 20–35%.)
- Set tolerance baselines: Define your acceptable gap range, centerline offset, and bevel angle using your ISO 5817 acceptance criteria.
- Prototype on one fixture: Mount a thermal camera — from our camera and monitoring lineup — on your fastest-moving, most-repeatable welding station. Run 50 parts, correlate thermal data with post-weld inspection.
- Build your confidence model: Train your AI on your data, not generic training sets. Measure correlation coefficients; aim for R² > 0.75 before production rollout.
- Integrate with your QMS: Log all thermal pre-checks to your ISO 3834-compliant traceability system.
- Expand to other cells: Once proven on one cell, deploy to 2–3 additional fixtures. Typical payback: 6–9 months across the facility.
Pro tip: Start with manual seam detection using your thermal camera as a handheld tool during setup. Operators can walk the joint with the camera and log gap measurements in a spreadsheet. This requires zero software integration and can reduce rework by 15–25% in week one. Then invest in automation once the ROI case is clear.
Ready to Detect Seam Geometry Before the Arc Strikes?
Thermal seam tracking eliminates joint prep surprises. See how HeatCore's real-time AI can integrate with your robotic welding lines to reduce rework by 40%+.
Book a HeatCore DemoTherness solution: Welding camera — Thermal and high-speed imaging that watches the arc, the pool and the cooling seam while the weld is made.